A Windows operating system failure during the boot process remains one of the most frustrating scenarios for both everyday users and system administrators.
When the Windows 11 graphical interface fails to launch, showing the Blue Screen of Death (BSOD) or freezing at the motherboard logo, standard diagnostic tools become unavailable. In these situations, the most reliable path to restoring a PC is the Windows Recovery Environment (WinRE) and the built-in Command Prompt available inside it.
Working through the WinRE console allows direct interaction with the system kernel and file structure while bypassing damaged graphical components and failed services. This approach requires a precise understanding of command syntax because these tools operate at a low level and do not provide the usual safety mechanisms or undo buttons. Proper use of Command Prompt can restore a damaged operating system even when automatic startup repair completely fails.
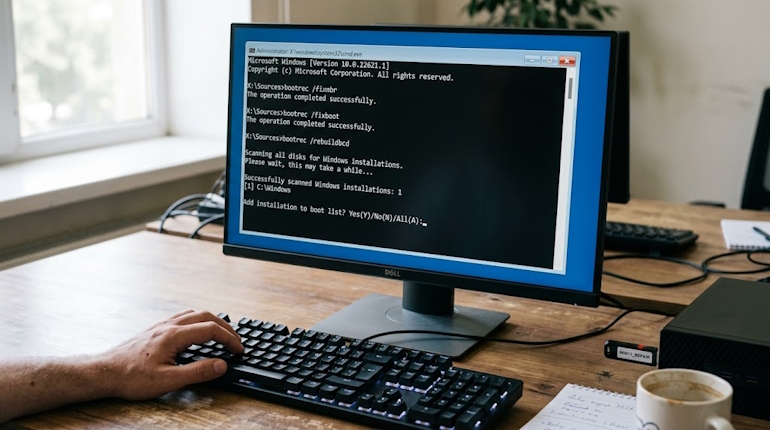
To access the terminal, you must boot into the recovery environment. This is usually done by forcing three consecutive computer restarts using the power button or by using a Windows 11 installation USB drive. After entering the advanced recovery options menu, select Troubleshoot, where the required tool is located — Command Prompt.
Below is a detailed breakdown of five of the most common critical Windows 11 startup failures and the terminal commands used to resolve them.
Repairing a Damaged EFI Bootloader and BCD Configuration
Modern computers use the UEFI standard, which relies on a hidden FAT32 system partition to store Windows boot files.
If this partition becomes damaged due to a sudden power loss, incorrect resizing of logical drives, or conflicts during a dual-boot installation, Windows 11 loses the ability to locate the path to its own kernel.
Typical signs of this issue include errors such as “Bootmgr is missing” or a blue screen with error code 0xc0000034, indicating missing or corrupted Boot Configuration Data (BCD).
Command Prompt tools allow you to manually mount this hidden technical partition and recreate the required startup instructions. The process requires sequential use of the built-in disk management utility to identify volumes and assign temporary drive letters. In the recovery environment, drive letters often change, so it is important to identify partitions by size and file system: the EFI volume always uses FAT32 and is usually around 100–300 MB.
The recovery process involves removing outdated boot configurations and generating fresh boot files directly from the Windows system directory. To complete the operation successfully, run the following commands in the exact order while checking the information displayed in the console.
diskpartStarts the built-in disk management utility for low-level work with hidden volumes and storage partitions.list volDisplays a table of all available volumes, allowing you to locate the hidden EFI system partition with the FAT32 file system.select vol XSelects a specific volume for further operations, where X must be replaced with the number assigned to the EFI partition.assign letter=ZTemporarily assigns the drive letter Z to the selected hidden volume, making it accessible for reading and writing files through Command Prompt.exitCloses the diskpart session and returns to the standard Command Prompt environment for running system commands.bcdboot C:\Windows /s Z: /f UEFICreates a new bootloader configuration by copying fresh startup files from the Windows directory to the mounted EFI partition.
Example: Repairing the EFI Partition and BCD
Assume Windows cannot boot and displays the following error:
Recovery

Your PC/Device needs to be repaired

The Boot Configuration Data for your PC is missing or contains errors.

File: \EFI\Microsoft\Boot\BCD
Error code: 0xc0000034
Boot the computer from a Windows installation USB drive → Repair your computer → Command Prompt.
First, identify the EFI partition:
diskpart

list vol
Select the EFI partition, assign a temporary drive letter, and exit DiskPart:
select vol 1

assign letter=Z

exit
In this example:
Volume 0— the Windows system partition;Volume 1— the hidden EFI partition containing bootloader files.
Now verify that Windows is actually located on drive C:
dir C:\WindowsIf the Windows folder contents are displayed, recreate the boot files:
bcdboot C:\Windows /s Z: /f UEFISuccessful output:
Boot files successfully created.Restart the computer:
shutdown /r /t 0Important: not every boot problem can be fixed with bootrec /fixmbr
This command appears frequently in older Windows recovery guides, but on modern systems using UEFI and GPT partitioning, it does not always solve the problem:
bootrec /fixmbrThe reason is that UEFI-based systems typically do not use the traditional MBR boot sector to start Windows. Instead, they rely on a dedicated hidden EFI System Partition (ESP) formatted with FAT32, where Windows Boot Manager files and the BCD (Boot Configuration Data) database are stored.
If the EFI partition or the BCD file itself is damaged, the bootrec /fixmbr command will not resolve the issue because it only modifies the master boot record. In this situation, the boot structure must be restored through:
diskpartFinding the EFI partition and assigning it a drive letter:
list vol assign letter=ZThen recreating the boot files:
bcdboot C:\Windows /s Z: /f UEFIIn simple terms:
- BIOS + MBR → commands such as
bootrec /fixmbr,bootrec /fixboot, andbootrec /rebuildbcdare commonly used; - UEFI + GPT → restoring the EFI partition and rebuilding BCD with
bcdbootis usually required.
Before running any recovery commands, determine the computer’s boot mode because an incorrect recovery approach may fail and can create additional startup issues.
To check the disk partition type:
diskpart
list disk
If a * symbol appears in the GPT column next to the disk, the system uses UEFI/GPT.
If there is no symbol, the system uses BIOS/MBR.
You can also check the boot mode using:
bcdeditIf the boot loader path shows:
\EFI\Microsoft\Boot\bootmgfw.efithen the system uses UEFI.
If it shows:
\bootmgrthen the system uses BIOS/MBR.
Deep System File Verification and Component Repair
Damage to critical dynamic-link libraries (DLLs) or system drivers inside the System32 directory inevitably leads to Windows 11 crashes during profile initialization or kernel loading.
This type of system degradation is most commonly caused by aggressive malware activity, SSD controller failures, or unsuccessful attempts to modify Windows using third-party tweaking tools. As a result, the operating system loses essential components required to maintain its normal operation.
The built-in SFC (System File Checker) and DISM (Deployment Image Servicing and Management) utilities remain the primary tools administrators use to repair this type of corruption. However, running them from the recovery environment requires manually specifying paths to the offline Windows installation. Since WinRE loads Command Prompt inside a virtual environment (usually assigned drive letter X), the utilities will attempt to scan that environment by default instead of the damaged Windows installation, making the process ineffective.
To point the scanner to the correct location, you must first identify which drive letter is assigned to the Windows 11 installation. In most cases, it remains the traditional C drive, but WinRE may shift drive assignments, placing the operating system on D or E instead. After confirming the correct letter through diskpart, you can begin restoring system files and component storage.
sfc /scannow /offbootdir=C:\ /offwindir=C:\WindowsPerforms an offline integrity check of Windows system files, comparing them against the local cache while the parameters specify the exact boot drive and operating system directory.dism /image:C:\ /cleanup-image /restorehealthUses the component store to repair severely damaged Windows files that cannot be restored by SFC alone.
Example: Deep Windows 11 System Component Verification and Repair
Assume Windows cannot boot after a failed update or corrupted system files. The computer starts in the WinRE recovery environment:
Advanced options → Command Prompt
First, determine which drive contains the Windows installation:
diskpart

list vol
In this example, Windows is installed on drive D: instead of the standard C:.
Exit DiskPart:
dir D:\WindowsVerify that the correct partition was found:
dir D:\WindowsIf the directory contents are displayed:
System32
WinSxS
explorer.exe
notepad.exe

etc.
you can begin the repair process.
First, scan and repair system files:
sfc /scannow /offbootdir=D:\ /offwindir=D:\WindowsIf SFC cannot repair all corrupted files, run DISM:
DISM /Image:D:\ /Cleanup-Image /RestoreHealthAfter the process completes, restart the computer:
shutdown /r /t 0After repairing damaged system components, Windows can once again properly load the kernel, system services, and user environment.
Canceling Endless or Stuck Windows Updates
The Windows 11 cumulative update delivery system is frequently criticized for its tendency to enter recovery loops when installation processes fail.
If a power interruption occurs during patch installation or a driver version conflict appears, the operating system may become trapped in an endless rollback cycle. The computer repeatedly restarts while attempting to undo failed updates but cannot correctly process pending system transactions.
The boot-blocking issue is often related to the pending.xml system file, which instructs Windows to complete previously started operations before reaching the desktop. When those operations become impossible to complete, the system enters a software deadlock. Command Prompt allows you to break this cycle by clearing pending tasks and allowing the kernel to start without attempting to apply corrupted update packages.
In addition to clearing pending operations, a proper recovery procedure requires removing the downloaded update cache. Otherwise, after the first successful startup, Windows Update may detect the damaged packages again and restart the installation process, potentially causing the same failure. The following commands are designed to completely break this update loop.
dism /image:C:\ /cleanup-image /revertpendingactionsResets unfinished system operations and cancels pending update installations, allowing Windows to boot normally.del C:\Windows\SoftwareDistribution\Download\*.* /qDeletes the contents of the Windows Update download cache without confirmation prompts, preventing the system from attempting to reinstall damaged update files.
Example: Canceling Endless or Stuck Windows 11 Updates
Assume that after installing a Windows 11 update, the computer becomes stuck in a loop:
Unable to complete updates.
Undoing changes.
Do not turn off your computer.
or repeatedly restarts while attempting to roll back changes.
Start the Windows recovery environment:
Advanced options → Command Prompt
First, determine the drive letter containing Windows (as shown in previous examples). Assume that in this case the operating system is installed on drive D:.
Cancel incomplete update operations:
DISM /Image:D:\ /Cleanup-Image /RevertPendingActionsRename the damaged Windows Update cache:
ren D:\Windows\SoftwareDistribution SoftwareDistribution.oldDelete the file that stores pending system servicing operations:
del D:\Windows\WinSxS\pending.xmlIf the file does not exist, Windows will simply display:
Could Not Find D:\Windows\WinSxS\pending.xmlThis does not indicate an error.
Additionally, clear the temporary update cache:
del D:\Windows\SoftwareDistribution\Download\*.* /s /qCheck system file integrity:
sfc /scannow /offbootdir=D:\ /offwindir=D:\WindowsRestart the computer:
shutdown /r /t 0Fixing Logical NTFS File System Errors
File system degradation remains one of the most common reasons Windows fails to boot, a problem that has affected Windows operating systems for decades. Unexpected shutdowns, critical SSD flash memory wear, or failing sectors on traditional hard drives can damage NTFS index structures, including the Master File Table (MFT). When the system kernel attempts to access a corrupted cluster, it receives an input/output error that can immediately stop the operating system from continuing the boot process.
The Check Disk utility, when launched with advanced parameters from the recovery environment, performs a deep analysis of the storage volume at a low level. It examines logical volume integrity, repairs lost file chains, and marks physically unreadable sectors as damaged while attempting to recover readable data into reserved disk areas. This operation requires exclusive access to the volume, which makes WinRE an ideal environment for running the scan.
Keep in mind that a deep scan of large storage devices may take anywhere from several dozen minutes to several hours depending on drive speed and capacity. Interrupting the process is strictly discouraged because stopping the console while file tables are being rebuilt may result in permanent and irreversible data loss.
chkdsk C: /f /r /xPerforms a complete volume analysis where/frepairs logical file system errors,/rrecovers data from damaged sectors, and/xforces the volume to dismount before scanning.
Example: Fixing Logical NTFS File System Errors in Windows 11
Assume that after an unexpected shutdown, Windows 11 can no longer boot and displays the following error:
Automatic Repair

Your PC did not start correctly.
or the system enters an endless recovery loop.
A possible cause is corruption of the NTFS file system structure, preventing Windows from correctly reading essential system files. Open:
Advanced options → Command Prompt
First, determine the drive letter assigned to Windows. This process was covered earlier. Assume that in the recovery environment Windows is located on drive D:.
Run a full file system check:
chkdsk D: /f /r /xThe command performs three main operations:
/f— Repairs logical file system errors, including damaged NTFS records./r— Scans the drive surface, identifies damaged sectors, and attempts to recover readable data./x— Forces the partition to dismount before scanning to provide complete access to the file system.- Repairs damaged file system records
During the scan, Windows analyzes the NTFS structure, including the MFT (Master File Table), repairs broken links between files and directories, and restores the volume to a consistent state.
- Checks the physical condition of the storage device
The /r parameter can reveal unreadable areas of the drive. If the number of damaged sectors continues increasing, this may indicate an SSD or HDD hardware problem rather than only a software-related failure.
After the scan completes successfully, Windows 11 can once again access the system partition correctly and continue the startup process.
After the check is finished, restart the computer:
shutdown /r /t 0Isolating and Removing Faulty Third-Party Drivers
Installing third-party drivers deeply into the Windows 11 kernel always carries some level of risk, especially when dealing with anti-cheat systems, low-level antivirus software, or proprietary applications designed for specialized hardware. If a driver contains a critical bug or becomes incompatible with the latest Windows update, the operating system may crash with a BSOD during the earliest stages of startup, long before the user login screen appears.
In many cases, even Safe Mode cannot resolve the problem because the faulty driver may be registered as a critical component required during boot. The only effective solution may be manual intervention through an offline Windows image using the DISM utility. This method allows you to display all non-Microsoft drivers installed in the system, identify the problematic package, and remove it from the hardware configuration.
Every third-party driver receives an internal system identifier in the format oem*.inf during installation. Removing a driver requires finding the correct identifier in the driver list and uninstalling it through the terminal. Carefully review the original file name and provider information displayed by the console to avoid accidentally removing a driver required for storage controllers or graphics hardware.
dism /image:C:\ /get-driversCreates a detailed list of all third-party drivers integrated into the offline Windows installation, including their current system identifiers.dism /image:C:\ /remove-driver /driver:oemX.infCompletely removes the specified driver package from the Windows driver store, where X represents the number identified in the previous command.
Example: Removing a Problem Driver from Windows 11 Using DISM
Assume that after installing a new graphics driver or third-party software, Windows 11 stops booting and constantly displays a blue screen:
SYSTEM_THREAD_EXCEPTION_NOT_HANDLED

What failed: nvlddmkm.sys
or:
DRIVER_IRQL_NOT_LESS_OR_EQUALSafe Mode also fails to start, so the problematic driver must be removed from the recovery environment.
Open:
Advanced options → Command Prompt
First, determine the Windows partition:
diskpart

list vol
In this example, Windows is located on drive D:
Volume 0 D Windows NTFS 476 GBExit:
exitDisplay the installed drivers:
DISM /Image:D:\ /Get-DriversDISM scans the offline Windows image and displays all drivers stored in the DriverStore.
Example output:
Published Name : oem42.inf
Original File Name : nv_dispi.inf
Provider Name : NVIDIA Corporation
Class Name : Display

Published Name : oem17.inf
Original File Name : netwtw12.inf
Provider Name : Intel
Class Name : Network
Use the manufacturer name and device category to identify the problematic driver.
In the DISM output, every third-party driver has an internal identifier:
oemX.infThis is the name Windows uses to manage driver packages. Pay attention to these fields:
Provider Name— driver manufacturer;Original File Name— original INF package file;Class Name— device category.
For example, if the problematic package belongs to NVIDIA:
Published Name : oem42.infRemove it:
DISM /Image:D:\ /Remove-Driver /Driver:oem42.infThe command removes the driver package from the Windows driver store, preventing the system from automatically loading it during the next startup.
Successful output:
Removing driver package oem42.inf

The operation completed successfully.
After removing the driver, restart the computer:
shutdown /r /t 0After the problematic driver is removed, Windows will usually start using a basic built-in Microsoft driver, allowing you to install a corrected version manually.
Important: Do not remove storage controller drivers (SATA, NVMe, RAID) or motherboard-related drivers unless you are completely certain. Removing them can make Windows completely unable to boot.

I’m Irina Petrova-Levin, a graduate of the Moscow Technical University of Communications and Informatics (MTUCI), where I earned my degree in Information Technology. My professional journey has been deeply rooted in JavaScript, PHP, and Python, driven by a profound fascination with how modern technology shapes our everyday lives. I strive to explain complex processes in a clear and accessible way without ever sacrificing accuracy or missing the core of the matter.
Now based in Dallas since 2019, my work reflects a unique synthesis of Eastern European engineering depth and the dynamic American tech mindset. This blend allows me to bridge two distinct technological traditions.
My goal is to deconstruct the real mechanisms behind the devices and systems we use daily. In my articles, I aim to deliver information that is not only practical and structured but also reveals the hidden logic of how our world actually works.